[phpBB Debug] PHP Warning: in file [ROOT]/includes/bbcode.php on line 483: preg_replace(): The /e modifier is no longer supported, use preg_replace_callback instead
[phpBB Debug] PHP Warning: in file [ROOT]/includes/bbcode.php on line 483: preg_replace(): The /e modifier is no longer supported, use preg_replace_callback instead
[phpBB Debug] PHP Warning: in file [ROOT]/includes/bbcode.php on line 483: preg_replace(): The /e modifier is no longer supported, use preg_replace_callback instead
[phpBB Debug] PHP Warning: in file [ROOT]/includes/bbcode.php on line 483: preg_replace(): The /e modifier is no longer supported, use preg_replace_callback instead
[phpBB Debug] PHP Warning: in file [ROOT]/includes/bbcode.php on line 483: preg_replace(): The /e modifier is no longer supported, use preg_replace_callback instead
[phpBB Debug] PHP Warning: in file [ROOT]/includes/bbcode.php on line 483: preg_replace(): The /e modifier is no longer supported, use preg_replace_callback instead
[phpBB Debug] PHP Warning: in file [ROOT]/includes/bbcode.php on line 483: preg_replace(): The /e modifier is no longer supported, use preg_replace_callback instead
[phpBB Debug] PHP Warning: in file [ROOT]/includes/bbcode.php on line 483: preg_replace(): The /e modifier is no longer supported, use preg_replace_callback instead
[phpBB Debug] PHP Warning: in file [ROOT]/includes/bbcode.php on line 483: preg_replace(): The /e modifier is no longer supported, use preg_replace_callback instead
[phpBB Debug] PHP Warning: in file [ROOT]/includes/bbcode.php on line 483: preg_replace(): The /e modifier is no longer supported, use preg_replace_callback instead
[phpBB Debug] PHP Warning: in file [ROOT]/includes/bbcode.php on line 483: preg_replace(): The /e modifier is no longer supported, use preg_replace_callback instead
[phpBB Debug] PHP Warning: in file [ROOT]/includes/bbcode.php on line 483: preg_replace(): The /e modifier is no longer supported, use preg_replace_callback instead
[phpBB Debug] PHP Warning: in file [ROOT]/includes/bbcode.php on line 483: preg_replace(): The /e modifier is no longer supported, use preg_replace_callback instead
[phpBB Debug] PHP Warning: in file [ROOT]/includes/bbcode.php on line 483: preg_replace(): The /e modifier is no longer supported, use preg_replace_callback instead
[phpBB Debug] PHP Warning: in file [ROOT]/includes/bbcode.php on line 483: preg_replace(): The /e modifier is no longer supported, use preg_replace_callback instead
[phpBB Debug] PHP Warning: in file [ROOT]/includes/bbcode.php on line 483: preg_replace(): The /e modifier is no longer supported, use preg_replace_callback instead
[phpBB Debug] PHP Warning: in file [ROOT]/includes/bbcode.php on line 483: preg_replace(): The /e modifier is no longer supported, use preg_replace_callback instead
[phpBB Debug] PHP Warning: in file [ROOT]/includes/bbcode.php on line 483: preg_replace(): The /e modifier is no longer supported, use preg_replace_callback instead
[phpBB Debug] PHP Warning: in file [ROOT]/includes/bbcode.php on line 483: preg_replace(): The /e modifier is no longer supported, use preg_replace_callback instead
[phpBB Debug] PHP Warning: in file [ROOT]/includes/bbcode.php on line 483: preg_replace(): The /e modifier is no longer supported, use preg_replace_callback instead
[phpBB Debug] PHP Warning: in file [ROOT]/includes/bbcode.php on line 483: preg_replace(): The /e modifier is no longer supported, use preg_replace_callback instead
[phpBB Debug] PHP Warning: in file [ROOT]/includes/bbcode.php on line 483: preg_replace(): The /e modifier is no longer supported, use preg_replace_callback instead
[phpBB Debug] PHP Warning: in file [ROOT]/includes/bbcode.php on line 483: preg_replace(): The /e modifier is no longer supported, use preg_replace_callback instead
[phpBB Debug] PHP Warning: in file [ROOT]/includes/bbcode.php on line 483: preg_replace(): The /e modifier is no longer supported, use preg_replace_callback instead
[phpBB Debug] PHP Warning: in file [ROOT]/includes/bbcode.php on line 483: preg_replace(): The /e modifier is no longer supported, use preg_replace_callback instead
[phpBB Debug] PHP Warning: in file [ROOT]/includes/bbcode.php on line 483: preg_replace(): The /e modifier is no longer supported, use preg_replace_callback instead
[phpBB Debug] PHP Warning: in file [ROOT]/includes/bbcode.php on line 112: preg_replace(): The /e modifier is no longer supported, use preg_replace_callback instead
[phpBB Debug] PHP Warning: in file [ROOT]/includes/bbcode.php on line 112: preg_replace(): The /e modifier is no longer supported, use preg_replace_callback instead
[phpBB Debug] PHP Warning: in file [ROOT]/feed.php on line 173: Cannot modify header information - headers already sent by (output started at [ROOT]/includes/functions.php:3887)
[phpBB Debug] PHP Warning: in file [ROOT]/feed.php on line 174: Cannot modify header information - headers already sent by (output started at [ROOT]/includes/functions.php:3887)
OUPower.com Discussion Board for Over Unity Power Research 2015-03-27T09:29:04-04:00 https://www.oupower.com/phpBB/feed.php?f=8 2015-03-27T09:29:04-04:00 2015-03-27T09:29:04-04:00 https://www.oupower.com/phpBB/viewtopic.php?t=2341&p=32269#p32269 <![CDATA[Building Your Own Shop Equipment • Re: Diy Waste Oil Heater]]>
I'm sorry I've been away for so long. I got a divorce and had to move, get a new house, re-build my shop from scratch... everything was crazy for a while; but now I'm back!

I'm trying to re-build membership on the forums again here. If you're around and interested in continuing work with Clean Energy Tech or any other crazy stuff... I'm here too. I'd love to hear from you.

Statistics: Posted by Chris — Fri Mar 27, 2015 9:29 am


]]>
2015-03-24T10:21:52-04:00 2015-03-24T10:21:52-04:00 https://www.oupower.com/phpBB/viewtopic.php?t=7750&p=32260#p32260 <![CDATA[Building Your Own Shop Equipment • Ultimate Hot Wire foam Cutter!]]>
I've created about 6 different hot wire foam cutters over the years. My first one was a simple V and then I got progressively more versatile from there. This past month I took on the project of putting blue-board up in my basement for insulation on the walls. It's an interesting project that required me to make a much better and more precise hot wire foam cutter. I started with a simple H foam cutter that I saw here on youtube. Once I find the link for it I will give that guy a link here in the description.

I then progressed to a longer length cutter that could use a rail for very precise long straight cuts. But that one was limited to only doing pieces 2' wide and I had to move the wire every time I needed to change more than a few inches because the whole frame was only 28 or 30 inches wide. meaning if I wanted to cut say a 4" piece off then next a 12" piece... there was no way to do it without moving the wire itself. Super pain in the butt!

So I finally ended on a design that I was trying to build in the first place, I just didn't think on the task enough until I was frustrated by the short-comings of the other 2 ideas. I wanted something simple that could use my workbench as a tool. I didn't want to hold my workbench prisoner to this project. That was key to me. Keep it super simple, keep it easy to setup, make it highly accurate.

Well this design that I'm dubbing the "Ultimate Hot Wire Foam Cutter" is all of those things. You can set it up in minutes. Seconds really if you already have your Nichrome wire to length. You can cut ANY size foam from huge 8' pieces, any width ...to tiny little ones. The fence can even be put at an angle to accommodate long pieces that would otherwise hit something in your shop. This setup also allows the user to go as high as they want because they just need more voltage and they can have a hot wire that exceeds a foot in length if desired. I am fine with about 6" of hot wire. I have no need (right now) for more than that.

Finally, the throat on this cutter. Well quite frankly it's the size of your shop. Because you're only limited by the distance from your wall to your wire. In my case that gives me slightly more than an 8' throat. So I could cut perfect 8' x 8' squares if I really wanted to. That would be crazy big!

Using the ceiling as the top anchor worked so much better than I thought it would because the rubber band gives the perfect bit of tension on the wire that I need.

Questions, let me know! I'll be curious to see what you guys think!
Sorry for the blurry shots!

Statistics: Posted by Chris — Tue Mar 24, 2015 10:21 am


]]>
2012-02-24T19:42:16-04:00 2012-02-24T19:42:16-04:00 https://www.oupower.com/phpBB/viewtopic.php?t=1446&p=28098#p28098 <![CDATA[Building Your Own Shop Equipment • Re: Build your own Sandblaster]]> im gonna build too

Statistics: Posted by tireboy — Fri Feb 24, 2012 7:42 pm


]]>
2012-02-24T19:39:30-04:00 2012-02-24T19:39:30-04:00 https://www.oupower.com/phpBB/viewtopic.php?t=396&p=28096#p28096 <![CDATA[Building Your Own Shop Equipment • Re: Plastic forming at home.]]>

Statistics: Posted by tireboy — Fri Feb 24, 2012 7:39 pm


]]>
2011-12-13T04:15:21-04:00 2011-12-13T04:15:21-04:00 https://www.oupower.com/phpBB/viewtopic.php?t=102&p=25943#p25943 <![CDATA[Building Your Own Shop Equipment • Re: EDM plans or schematics]]> Statistics: Posted by Oliveber — Tue Dec 13, 2011 4:15 am


]]>
2011-09-20T14:43:58-04:00 2011-09-20T14:43:58-04:00 https://www.oupower.com/phpBB/viewtopic.php?t=2505&p=25828#p25828 <![CDATA[Building Your Own Shop Equipment • ]]>

Anyway Dngspot yes you need a lot more holes in your secondary combustion cylinder. That should help a TON.

Statistics: Posted by Chris — Tue Sep 20, 2011 2:43 pm


]]>
2011-02-13T22:42:41-04:00 2011-02-13T22:42:41-04:00 https://www.oupower.com/phpBB/viewtopic.php?t=2505&p=25786#p25786 <![CDATA[Building Your Own Shop Equipment • ]]>
Keep up the good work

Statistics: Posted by Jehu — Sun Feb 13, 2011 10:42 pm


]]>
2011-02-13T11:31:03-04:00 2011-02-13T11:31:03-04:00 https://www.oupower.com/phpBB/viewtopic.php?t=2505&p=25785#p25785 <![CDATA[Building Your Own Shop Equipment • ]]> I think I am getting closer to a workable heater. Today I took the pot, lid and cylinder to work to do some work. I made new brackets for the cylinder and lid. I noticed when I took them apart one of the brackets was holding the cylinder above the lid about 1/16 inch. I also obtained a large piece of sand paper that had an adhesive side and stuck it to a flat bench. I then took the pot and surfaced the top edge. That sucker is flat now. I took a light around the lid and pot from the inside, and could not see light from the out side of the pot. The biggest problem was actually my spring and hinge design. I noticed when I put the freshly surfaced pot into place I could pull the handle up and the front of the pot would lift about 1/16 inch before it would make contact to the lid. I placed a 1/2 inch spacer on the front of the hinge assembly under the pot and that did the trick. I will weld a proper spacer to the hinge later.
I lit the thing and brought it to temp. It made a couple of humming noises, this is what it did before it would throw flames out the secondary burner, and there were no flames this time. This may be because of the larger holes I made in the lid for the pot air intake. I will eliminate 2 of the holes until I have the time to weld them and re-drill to ¼ inch.
The hottest I could get the thing was 380 degrees at the top plate near the flue. The drums reached 300 and the pot was hanging around 800. All temps were taken at the top burn with a 1/4 inch pool of oil in the pot.
It was tough to light and this may be due to the amount of holes in the secondary burner, as per Spike. I plan on buying bolts to fill the 50% of the holes.
The exhaust was very clear, all I could see was heat waves, no smoke during all burn levels.
Over all I think things are moving in the right direction.

Statistics: Posted by Dngspot — Sun Feb 13, 2011 11:31 am


]]>
2011-01-01T09:46:52-04:00 2011-01-01T09:46:52-04:00 https://www.oupower.com/phpBB/viewtopic.php?t=2505&p=25751#p25751 <![CDATA[Building Your Own Shop Equipment • ]]> I also built a shelf for the bucket and plumbed in the oil line.

Image

Statistics: Posted by Dngspot — Sat Jan 01, 2011 9:46 am


]]>
2010-12-31T09:23:43-04:00 2010-12-31T09:23:43-04:00 https://www.oupower.com/phpBB/viewtopic.php?t=2505&p=25750#p25750 <![CDATA[Building Your Own Shop Equipment • ]]>
Image

The cylinder was drilled with 38- 5/16" holes and two tabs were added. The tabs fasten to the pot lid, so when the pot is removed I do not have to fiddle with the lid.

Image

I did not post a pic of the plate the pot sits on. Again it has a spring attached to under it and uses a standard hinge.

Image

The lid for the pot was drilled and taped to 1/2" pipe. I made tube connector from a 1/2" pipe nipple and cap. The nipple and cap were drilled a 3/8 bit.

Image

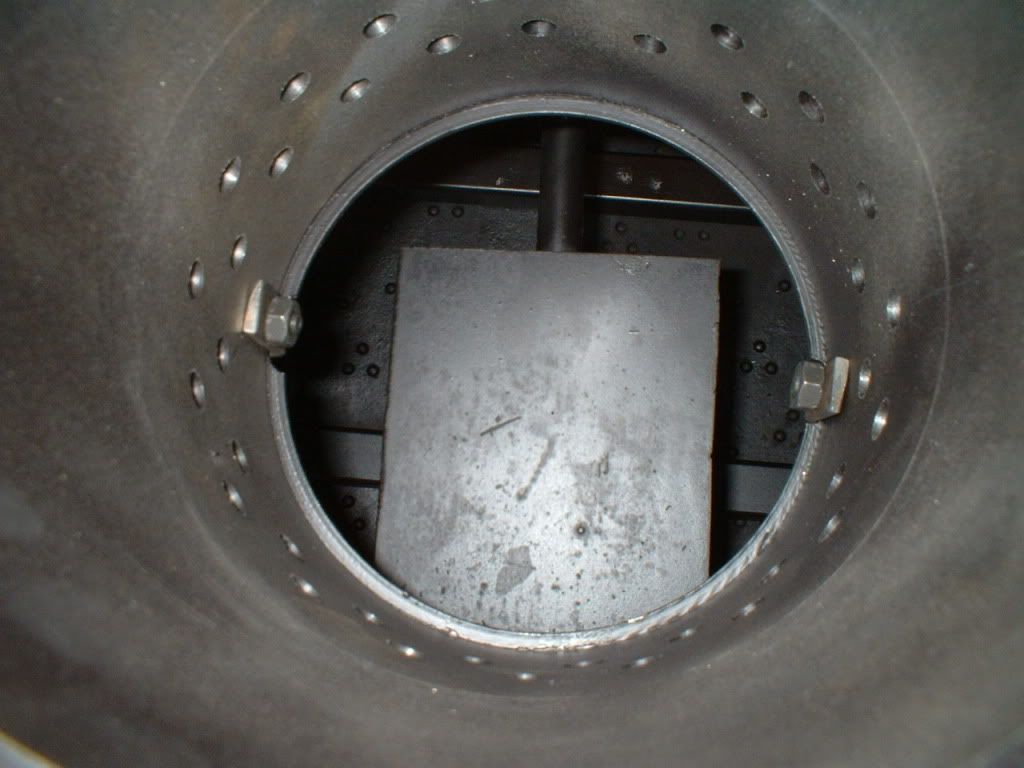
I built a baffle from a piece of scrap. It hangs from the top about center of the drum assembly. The baffle is about 12" wide

Image

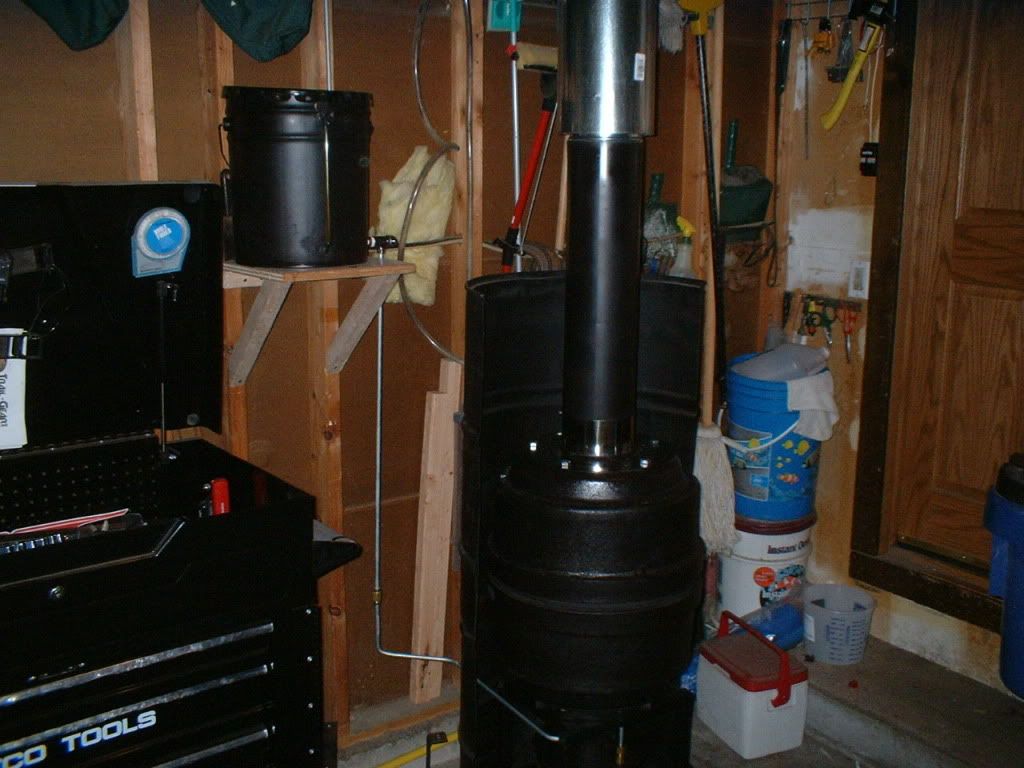
I painted and placed it in the old heater heat shield.

Image

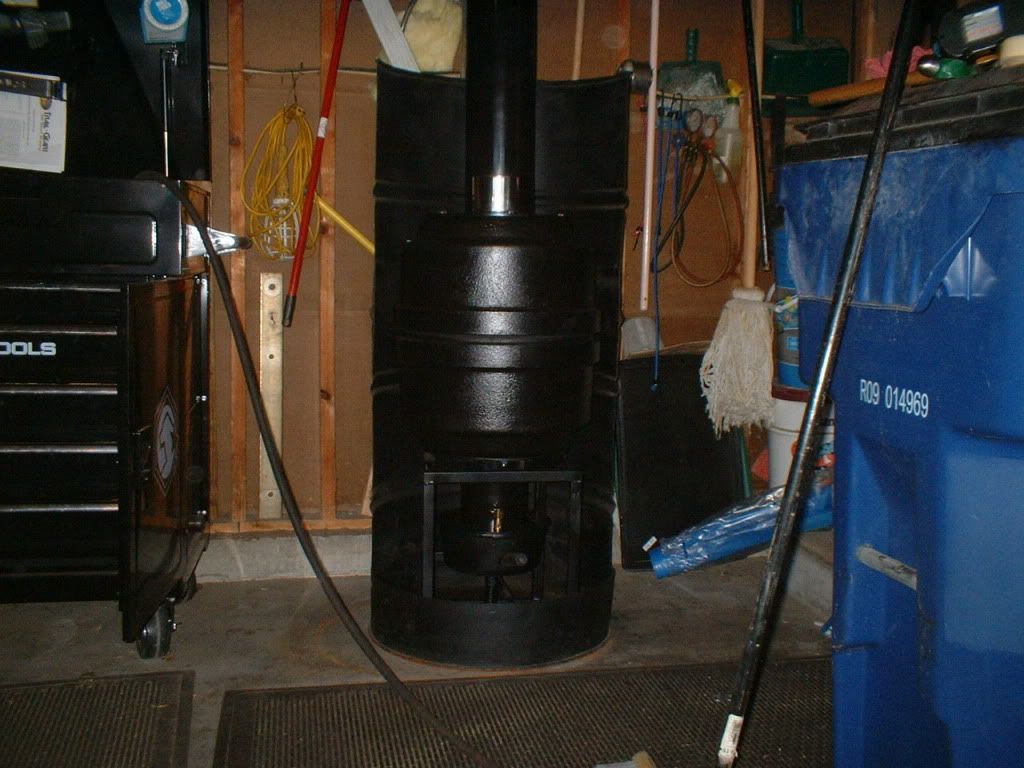
I did a test run with about a quart of oil in the pot. The heater smoked out of the pot lid 1/4 inch holes and when the oil came to temp flames came from the cylinder holes. There are about three things that I can change to fix the problem. The first would be a problem with the baffle. It was a design that I thought up not one that Spike uses. The second would be, my chimney reduces to 5 inches. I may have to put in 6 inch pipe. The third would only affect the smoke, I have too much vent in the pot lid, air could be coming in from between the lid and pot. I could install temporary bolts in the vent holes and see if the lower pot continues to get enough air but does not smoke.

Statistics: Posted by Dngspot — Fri Dec 31, 2010 9:23 am


]]>
2010-12-28T22:04:02-04:00 2010-12-28T22:04:02-04:00 https://www.oupower.com/phpBB/viewtopic.php?t=2505&p=25749#p25749 <![CDATA[Building Your Own Shop Equipment • ]]> The remainder to finish the project.
1. Build and fasten a couple of brackets to hold the pot lid to the cylinder.
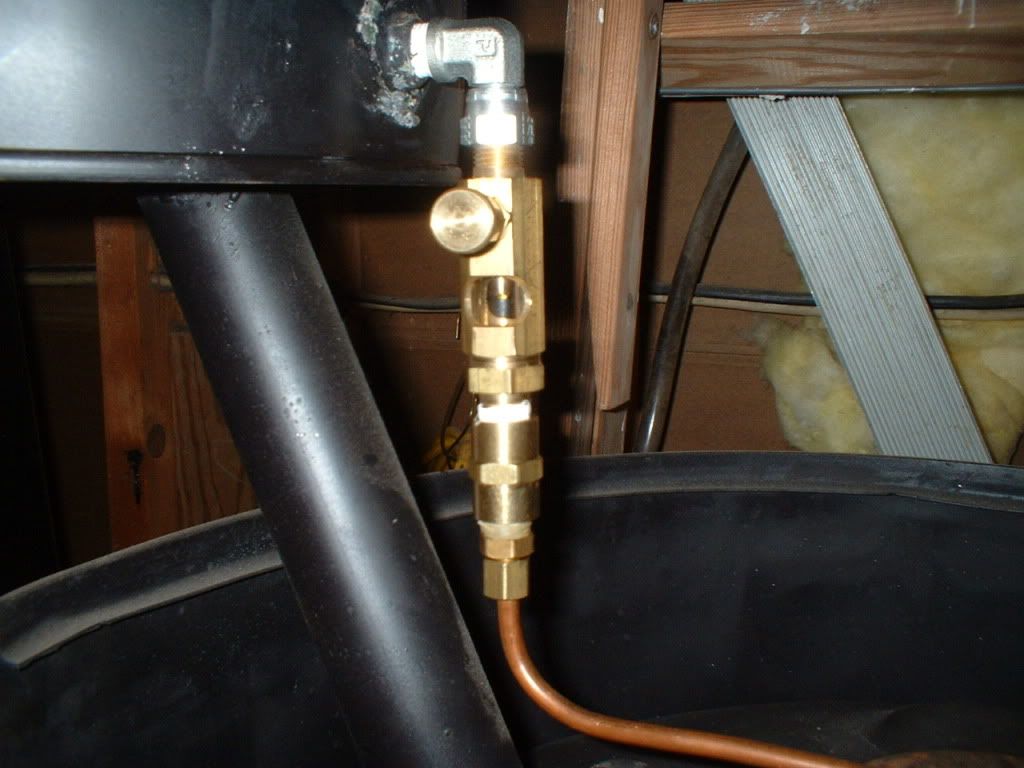
2. Drill into the pot lid and build or assemble a connector for the oil line. I will use 3/8" copper or steel line.
3. Drill the vent holes in the cylinder.
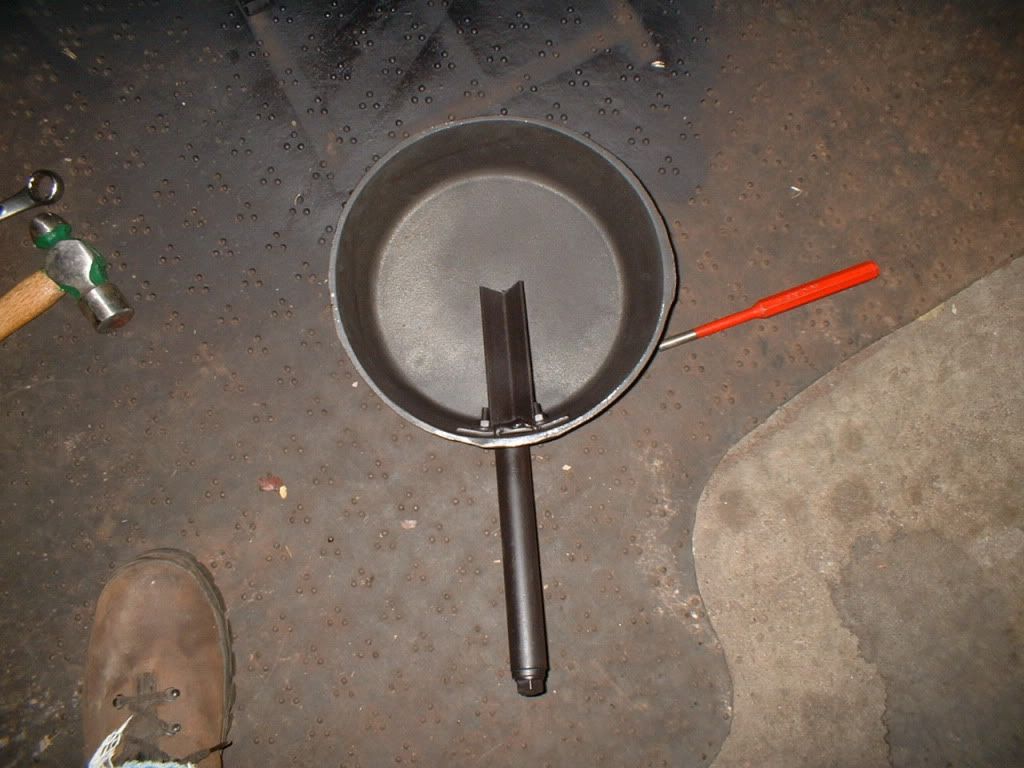
4. Drill the pot to accept all thread for a handle.
5. Install a piece of angle iron in the pot to direct the oil to the center.
7. Test out side
8. Clean and paint then install.


Image

Statistics: Posted by Dngspot — Tue Dec 28, 2010 10:04 pm


]]>
2010-12-28T22:03:16-04:00 2010-12-28T22:03:16-04:00 https://www.oupower.com/phpBB/viewtopic.php?t=2505&p=25748#p25748 <![CDATA[Building Your Own Shop Equipment • Spike's Truck Drum Waste Oil Heater]]>
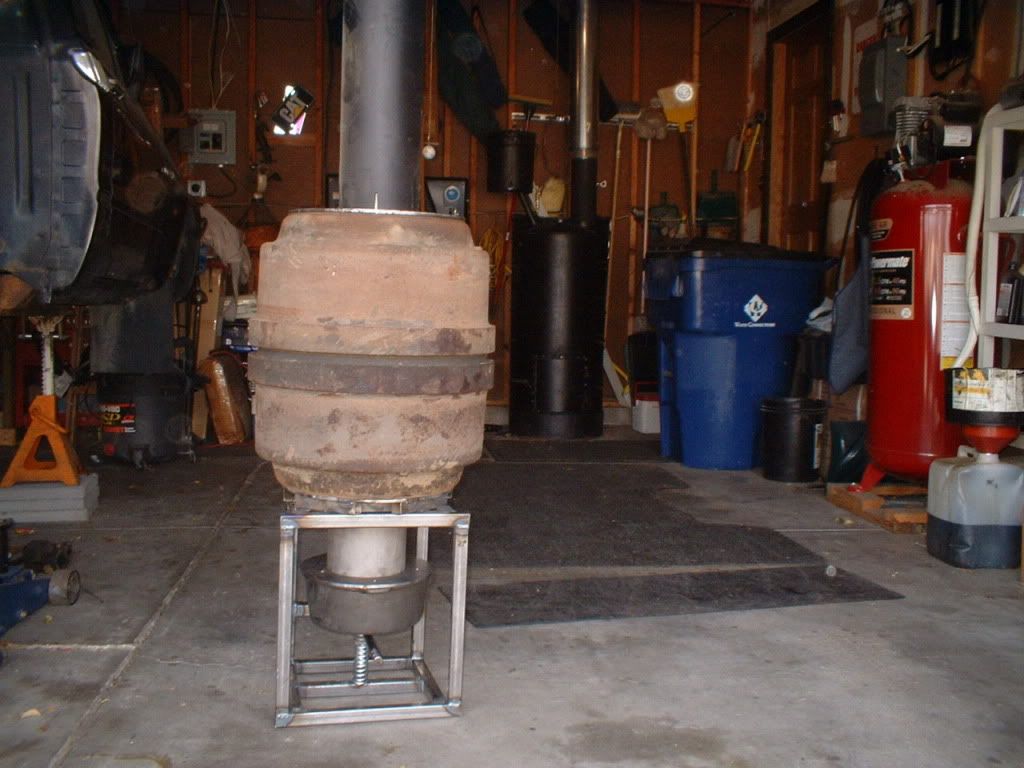
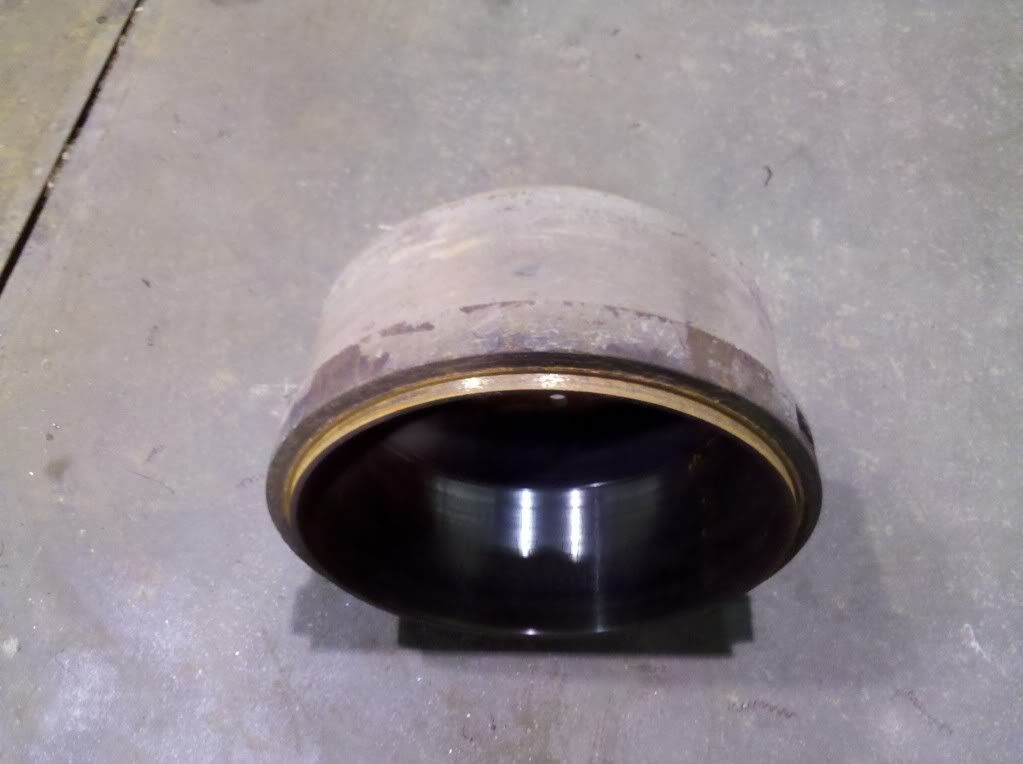
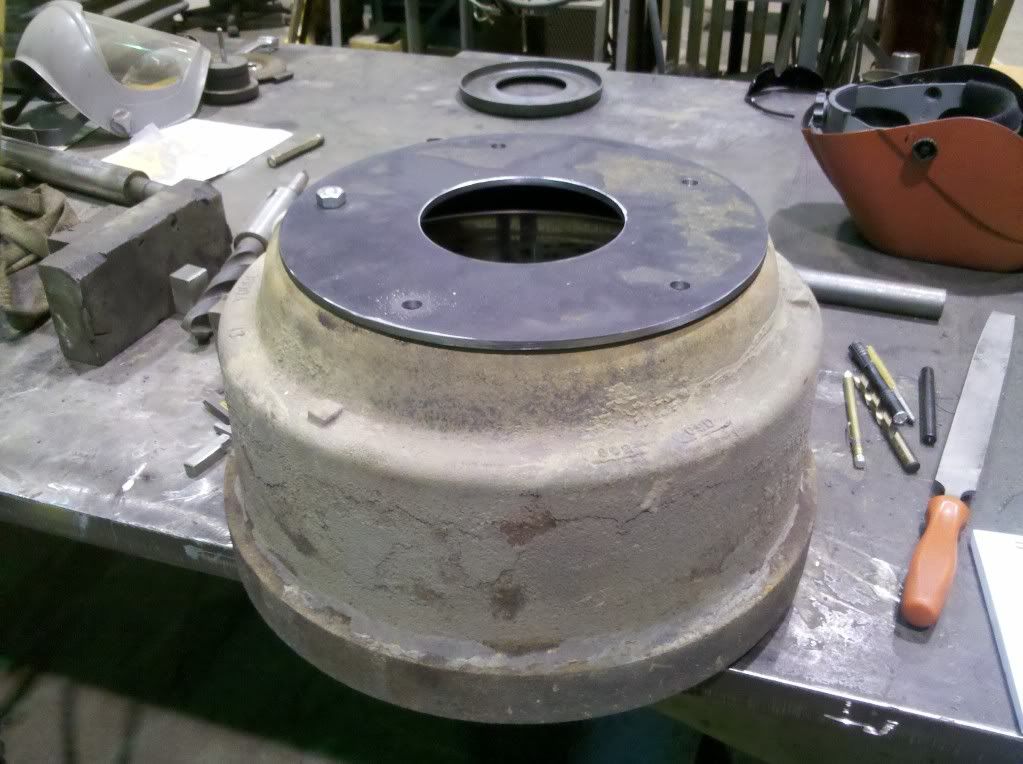
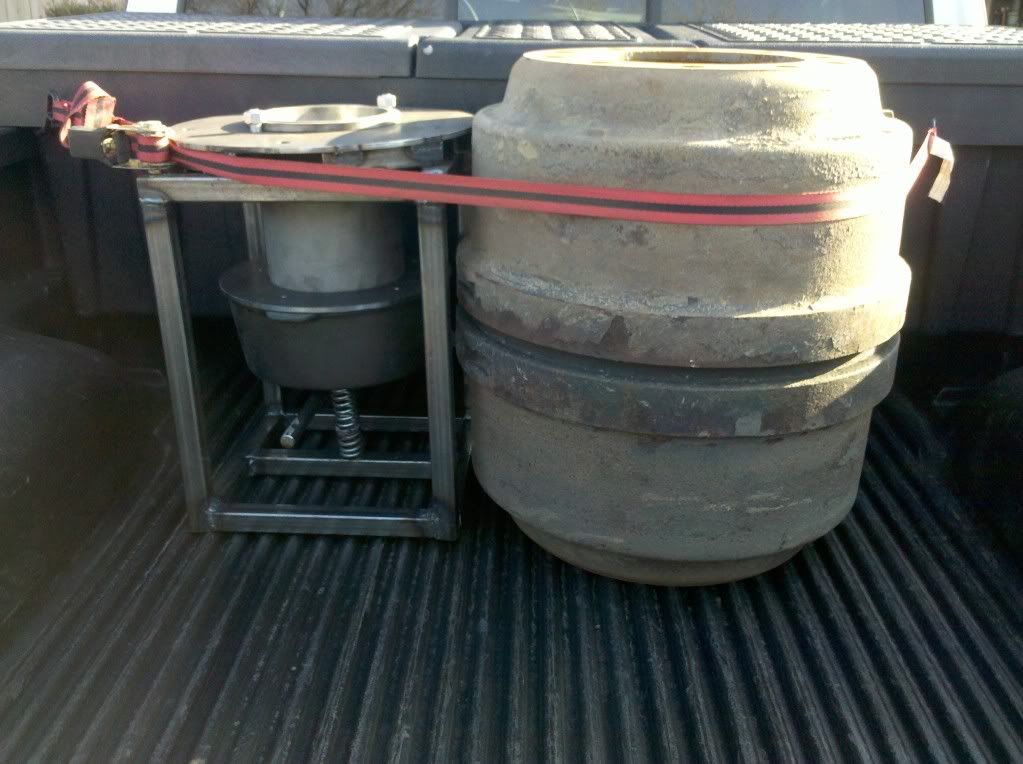
The first thing I did was obtain a couple of 16.5" brake drums from a large semi type truck. I put them on the lathe at work and machined the drums so the open edge of the drums would mate with each other.

Here is a pic of the lathe I used; it took about 2 hours to do both drums. It is also available to me during off hours at work.

Image

The drum edges, they are orange looking because of the fresh rust. I kept these in the back of my truck for a week while I gathered parts.

The outside cut on the bottom drum.

Image

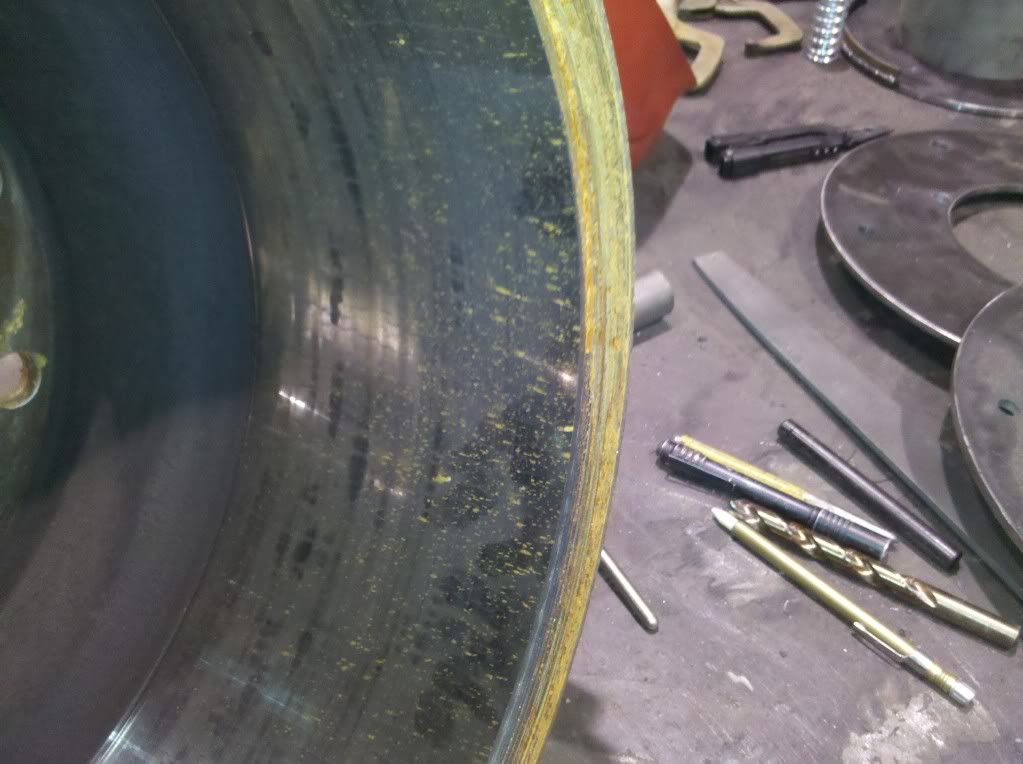
A close up of the inside cut on the top drum. Sorry for the pic quality.

Image

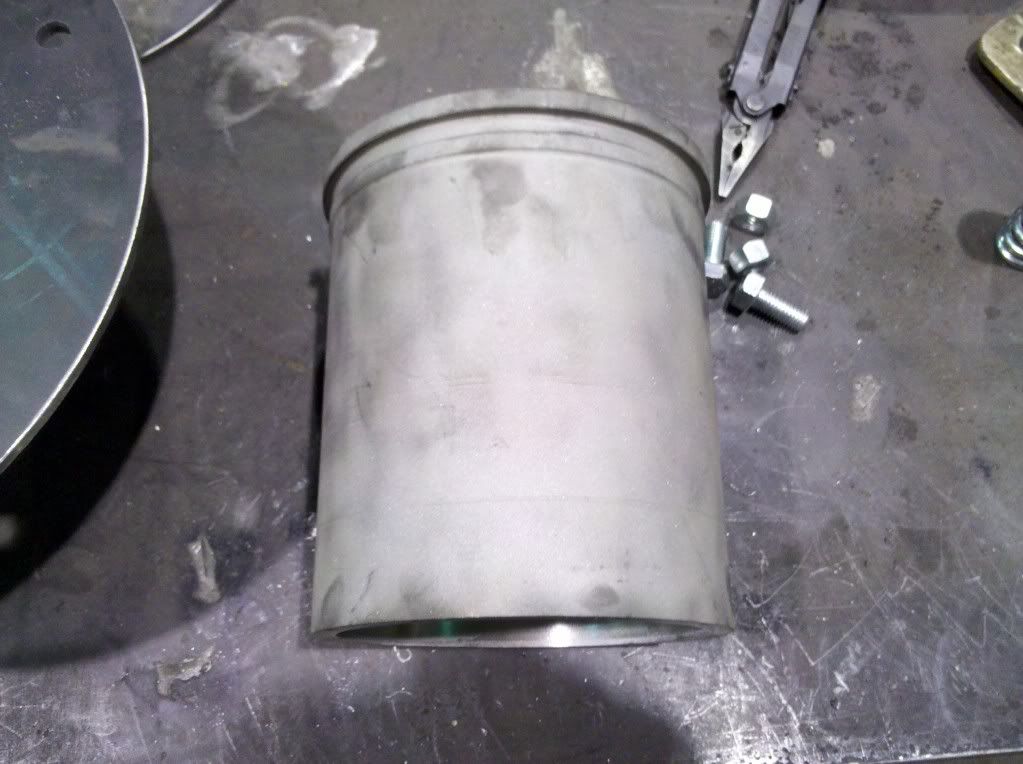
The cylinder after sandblasting and removing the bottom 2 inches, I believe it came from a C-15 Cat engine. I cut the bottom flat and inside of the cylinder with the lathe. I cut the inside of the cylinder about .020" because that area seems as hard as diamonds and does not drill well. The air vent holes will be in the lower 3" of the cylinder.

Image

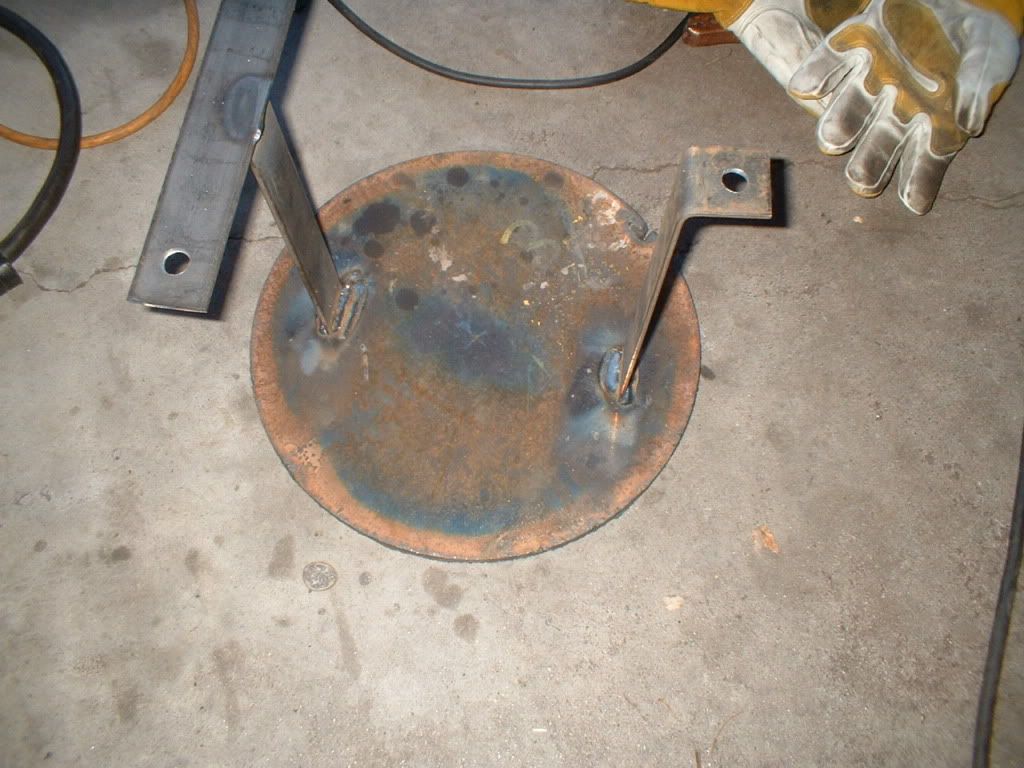
I cut 2 round plates to fit on the lug side of the brake drums. Both plates have 5- 1/2" holes for bolting. There are more holes, two for the bottom plate to fasten the cylinder to.

Image

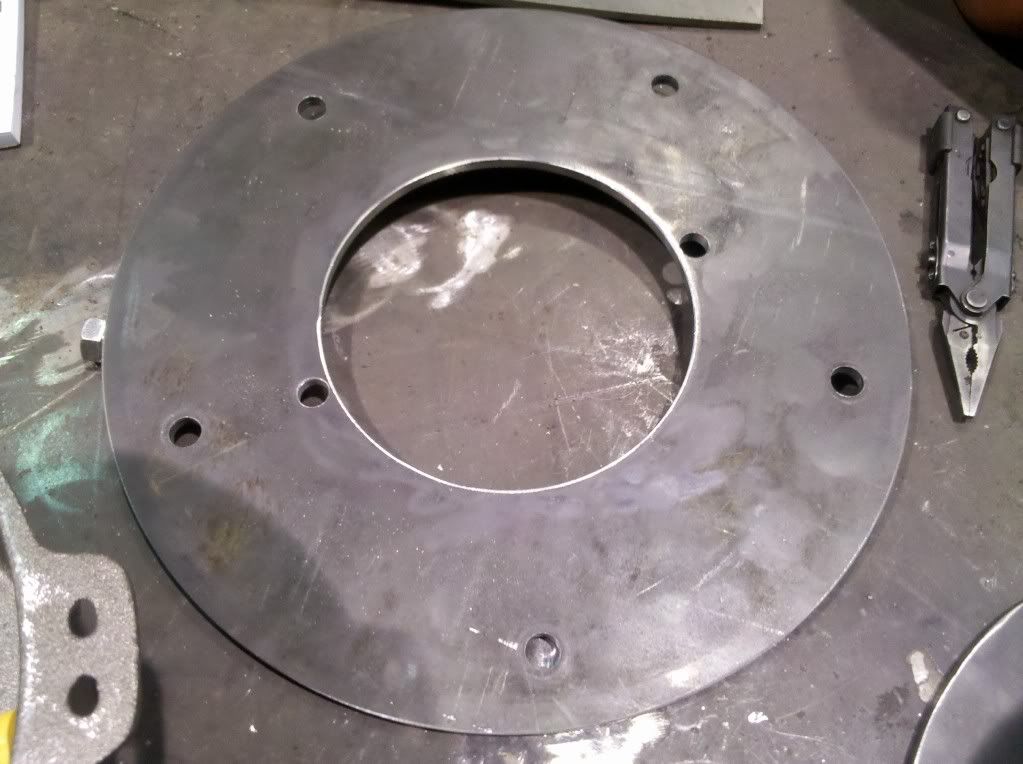
This pic shows the top drum with the second plate on top.

Image

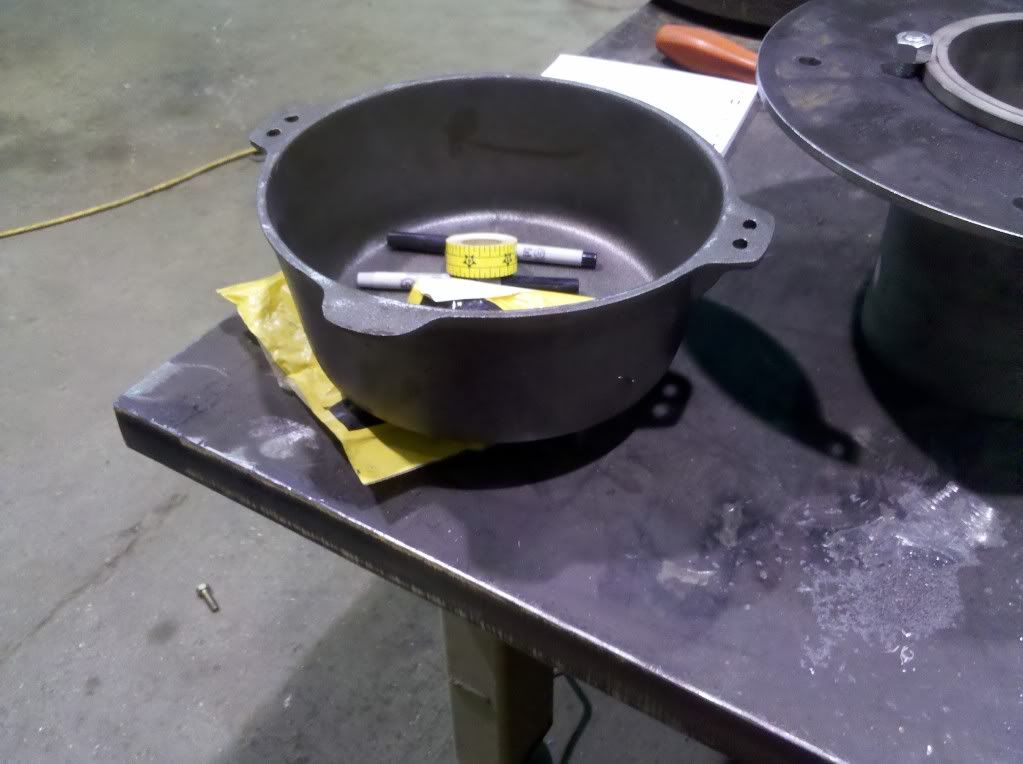
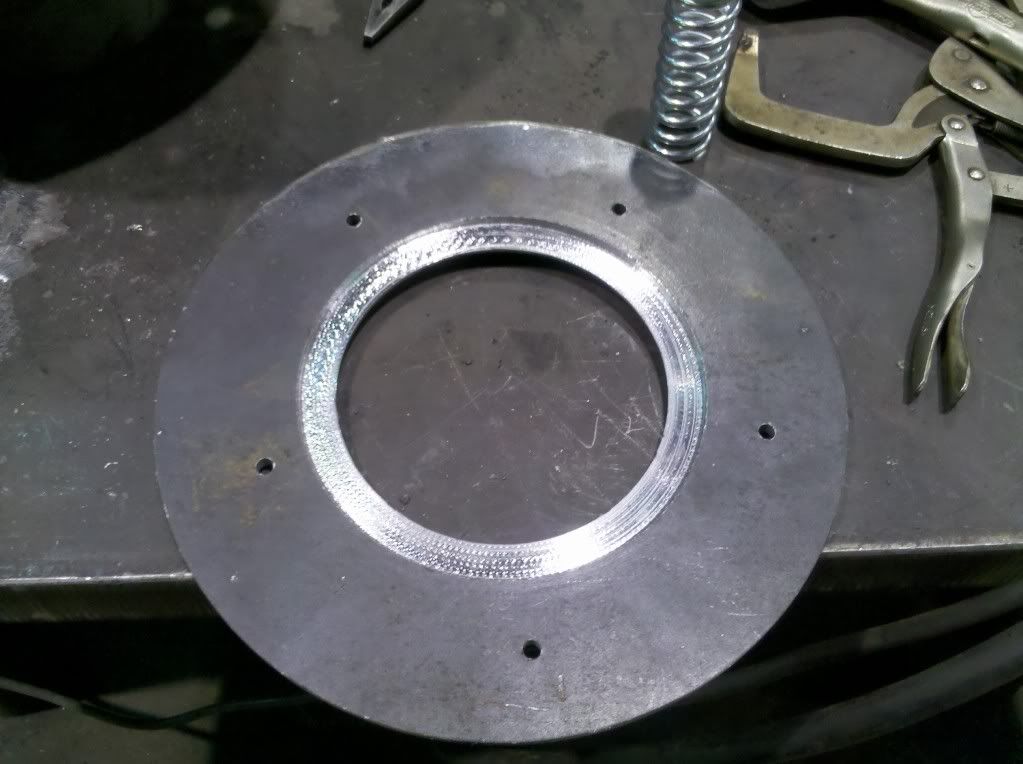
I cut another disk. It will set on top of the cast pot. The pot is the place the oil will drip into. The disk is machined so the cylinder will fit into it. The cylinder is about 6" O.D. The disk also has 5- 1/4" vent holes and a piece of steel welded to it, to help position the pot.

Here is the pot.

Image

The bottom of the disk

Image

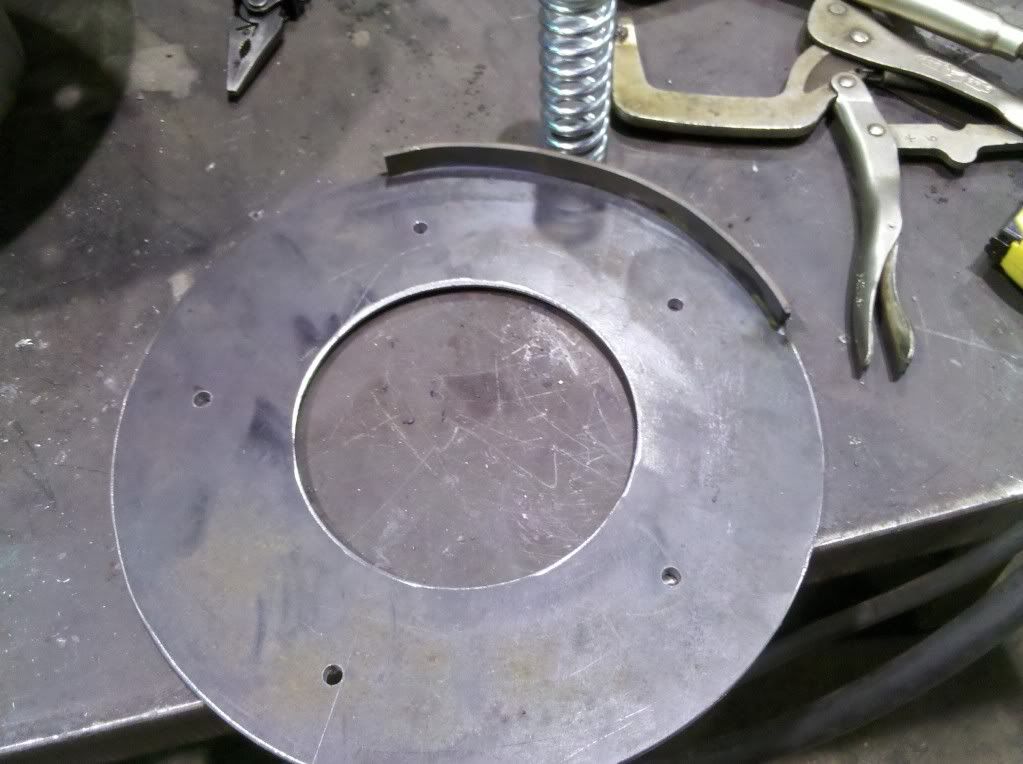
... and the top of the disk.

Image

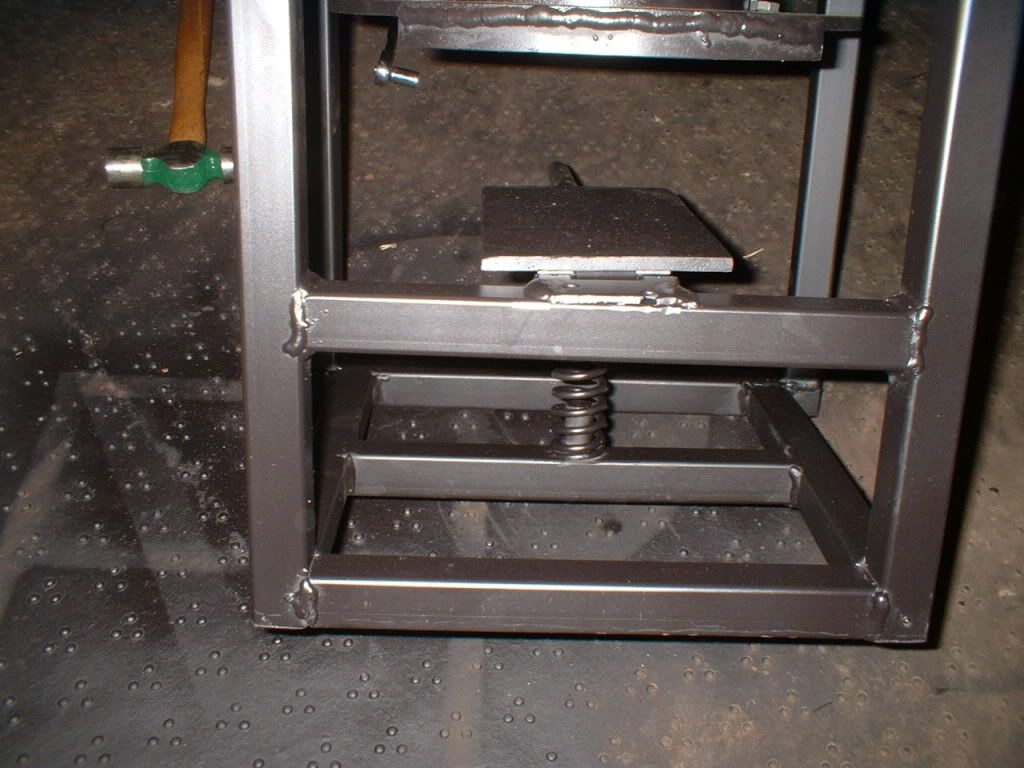
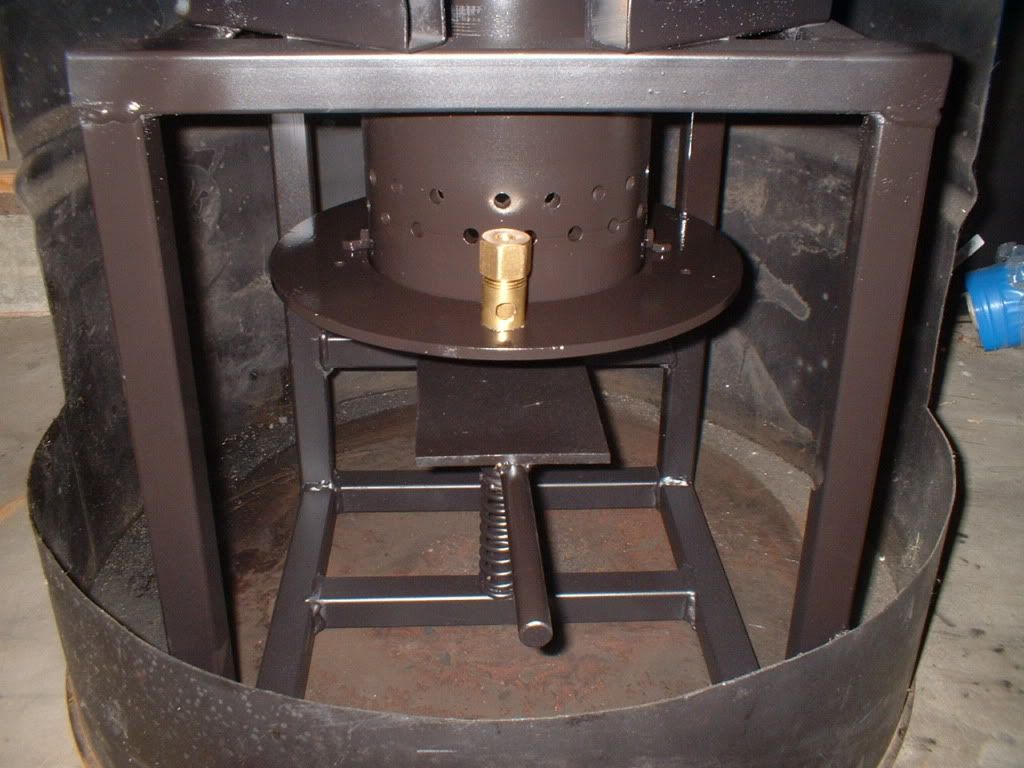
This is a pic of the burner assembly less the frame. The top plate will be bolted to the lower brake drum.

Image

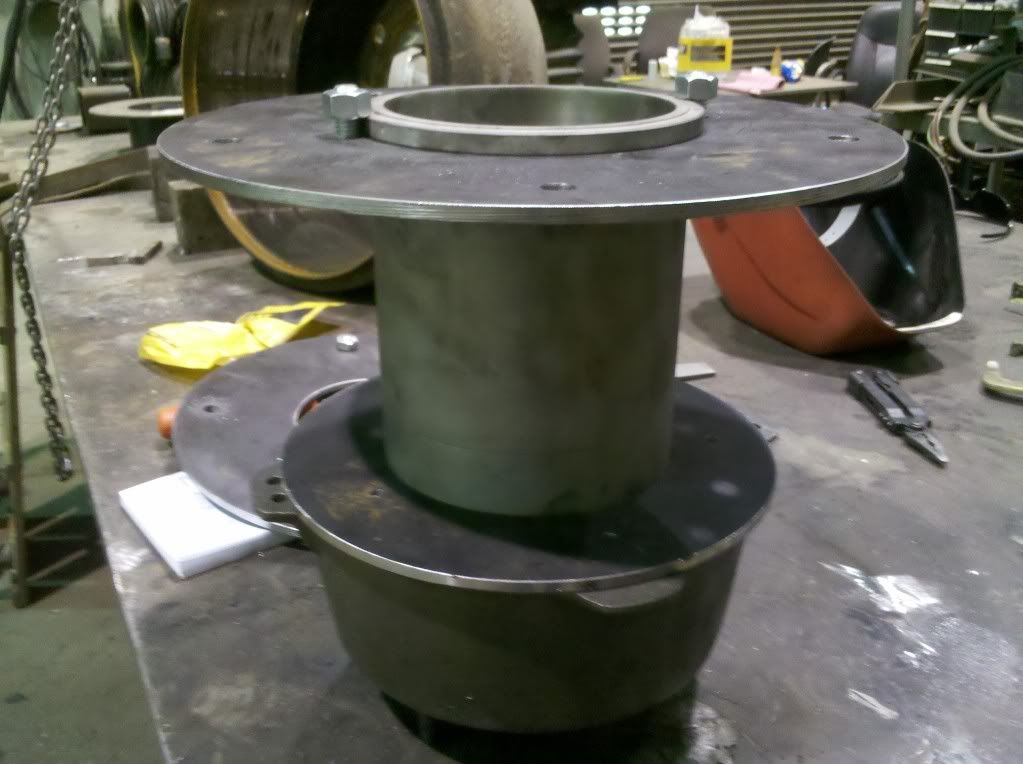
The frame has a spring and a handle to release the pot. The spring pushes directly on the bottom of a plate that the pot sets on. The plate is attached to a hinge that is welded to a cross member on the back of the frame. There are two dowels one for the bottom of the spring and one for the plate to keep it in place. The plate for the bottom drum has 1 inch spacers for bolt clearance, welded to the frame. The drums setting next to the frame are setting as they will once the frame and drums are mated.

Image

I need to widen the front of the frame; it is difficult to clear the pot. I also need to drill the cylinder for vent holes and install a baffle in the drums to deflect the draft out to the drums. Then I can weld on the draft tube, paint and install.

Statistics: Posted by Dngspot — Tue Dec 28, 2010 10:03 pm


]]>
2010-11-24T21:13:28-04:00 2010-11-24T21:13:28-04:00 https://www.oupower.com/phpBB/viewtopic.php?t=2341&p=25736#p25736 <![CDATA[Building Your Own Shop Equipment • ]]>
Image

Statistics: Posted by Dngspot — Wed Nov 24, 2010 9:13 pm


]]>
2010-01-18T11:00:22-04:00 2010-01-18T11:00:22-04:00 https://www.oupower.com/phpBB/viewtopic.php?t=2341&p=25239#p25239 <![CDATA[Building Your Own Shop Equipment • ]]> Statistics: Posted by Dngspot — Mon Jan 18, 2010 11:00 am


]]>
2009-07-19T08:06:07-04:00 2009-07-19T08:06:07-04:00 https://www.oupower.com/phpBB/viewtopic.php?t=2412&p=24449#p24449 <![CDATA[Building Your Own Shop Equipment • ]]> Statistics: Posted by nobody — Sun Jul 19, 2009 8:06 am


]]>